Composting is not just good for the garden; it’s also good for the environment. That said, there’s a science to it, and you need to get it right to ensure the best results!
Contents []
Composting may seem like a no-brainer to the uninitiated, but the kind of materials you add to your compost bin or pile will affect the quality of the organic fertilizer that it will produce a few months later. And no, you can’t just throw all kinds of materials in the pile as long as it is organic. Some household wastes cannot be added to a compost pile for different reasons, something that we will discuss in detail below.
| What is Composting? | Composting is the process wherein billions of microorganisms naturally break down food waste into a stable form. Once these natural ingredients reach their composting peak, they are ready to provide your soil nutrients that can certainly take your garden to the next level. |
| 3 Phases of Composting |
|
| 4 Basic Composting Elements |
|
| What to Put in Your Compost Pile? |
|
| What Cannot Be Composted? |
|
| How to Build and Manage Your Compost |
|
The 3 Phases of Composting

To understand why some household wastes are a no-no in a compost pile, you need to know how the composting process works.
Composting is the process of letting organic materials decompose aerobically. These materials are broken down by millions of microorganisms, eventually releasing nutrients that help boost soil nutrients and support plant growth. The breakdown of organic materials happens in three phases. These phases are:
Mesophilic: The mesophilic phase occurs in the early days of composting. At this point, microorganisms feed on the organic matter at low temperatures, about 20 to 40 degrees celsius.
Thermophilic: the thermophilic phase lasts for a few days to several months. During this time, the compost pile’s temperature rises from a moderate temperature of up to 40°C to a high temperature of over 40°C.
Cooling and Maturation: This is when the compost has completed the hot phase, on its way to finishing the composting process. During this point, the compost is prepared for curing to achieve a moist and aerated texture. The cooling and maturation phase lasts several months.
Generally, the compost pile temperature rises to 30°F or higher during the hottest peak of composition. But as the materials are broken down by microorganisms, the temperature decreases, eventually curing until it is ready to be used as a soil amendment.
Now here’s the thing, the kind of materials you use for composting will greatly affect the quality of the final product. To complete the decomposition process, your compost must have four basic composting elements. These are:
- Water
- Oxygen
- Nitrogen
- Carbon
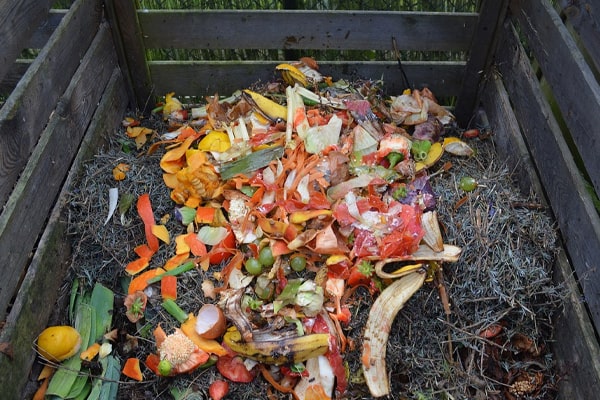
Water supports microbial life while oxygen sustains aerobic conditions. Nitrogen is derived from “green” composting materials like food wastes, grass, coffee grounds, etc., while carbon is derived from “brown” composting materials like leaves, straw, newspaper, and wood chips. Green and brown composting materials help keep the conditions within the compost pile ideal for microbial life.
What Can Be Composted
Greens: Nitrogen-rich wastes help support plant life and boost the soil's nutrient content.
- Fruit peels
- Vegetable peels
- Garden clippings
- Teabags
- Alcohol with low sugar content
- Coffee grounds and filters
- Eggshells
- Manures
- Grass
- Feathers, fur, and hair
Browns: Carbon-rich materials nourishes and energizes the microbes, speeding up the composting process.
- Soiled napkins, paper towels, and paper plates
- Newspaper
- Dried leaves, twigs, and straw
- Wood chips
- Yard debris
- Compostable takeout containers
- Dry pasta
- Paper bags
- Pine needles
- Sawdust
What Can’t Be Composted
- Plastic
- Glass
- Metal
- Styrofoam
- Raw meat
- Dairy
- Oily products
- Fatty products
- Used cat litter or pet wastes
- Garden wastes from diseased plants
- Starchy food
- Plant-based silverware
- Nut butter, yogurt, pudding
- Glossy magazines
- Fresh cut leaves
- Ashes from charcoal barbecues, wood stoves, and fireplaces
- bones, grease, fats, oils
- Weeds with seed heads
Building and Managing Your Compost Pile

Step 1: Choose a Spot
The location of the compost pile or bin is important. It should be set in a spot that has the ideal temperature to support microbial life.
Step 2: Choose a System
Would you like to use a compost bin or go for the open pile? A compost pile is best if you have wide-open spaces that are away from your neighbors. Because a compost pile tends to be managed less, there’s the risk of attracting pests and/or developing foul odors.
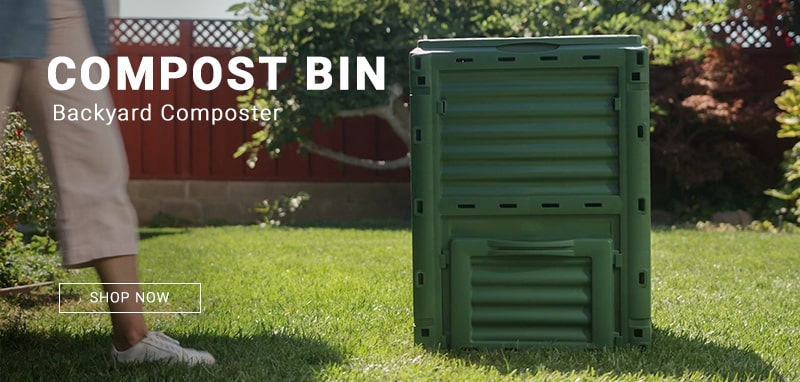
A compost bin is an excellent alternative to a simple open pile. You can make one on your own using wood pallets, chicken wires, old trash cans, and cement blocks, or buy a bin that’s made specifically for composting like the ECOgardener compost bin. A ready-made compost bin has an open bottom so that the compost is in constant contact with the soil, something that will improve microbial life as the compost matures.
When choosing a ready-made compost bin, always consider the volume to minimize surface-to-volume ratio, boost heat retention, and promote better drainage during composting. A 3x3x3 feet compost bin or larger should be big enough to start.
Step 3: Layering the Compost Materials
How you set your composting materials matters. If done improperly, the materials could become impacted, which will slow down the decomposition. You’ll need to layer the green and brown alternately - a technique called lasagna layering.
Start by using wood pallets and other platforms to elevate the pile off the ground. Then, add 6 to 12 layers of stalky materials at the bottom of the compost pit or bin. The coarse, stalky materials have lots of spaces in between, boosting airflow and drainage.
Rake every layer evenly to level the materials. Next, set a layer of brown materials, then add the first layer of green materials, and put it near the center of the nest. Continue alternating between green and brown compostables until you have a nice pile going. One thing to remember, the brown layers should be two to three times thicker than the green layers.
Step 4: Turn the Pile
The pile’s temperature will rise as the compost materials start degrading. It’s vital to turn the compost pile regularly to manage the temperature, promote healthy microbial health, and boost air circulation. Regular turning will also hasten the decomposition of the compost materials, which means you’ll produce compost quickly. Using a rake, shovel or pitchfork, turn the pile every 2 to 4 weeks. Continue to layer the compost as you turn.
Step 5: Use the Finished Compost
When fully decomposed, compost should be ready to use within 4 to 12 months. To check if the compost is ready to be used, check the texture. Finished compost should be crumbly and dark. It shouldn’t be foul-smelling, and there shouldn’t be recognizable chunks of compostables left. Some materials will take a longer time to decompose, like woody materials. Once the compost has become dark brown and crumbly, you can use it to:
- Top dress plants in the garden
- Amend the soil before planting
- Mix with other potting mediums
- Add to compost beds
Composting is easy, but it will take time. You can make your own bin at home or get your own ready-made compost bin like the ECO Gardener heavy-duty compost bin. Shop now and discover the joys of composting at home!


